












One of the most essential tools for the workplace is word processing software. And one of the biggest mistakes professionals make is not choosing a word processor that empowers them do more than just put words on a blank page.
You probably spend more time in Google Docs than you'd like to admit, drafting proposals, writing meeting notes, putting together client documentation, and everything in between. But here's the thing: most people only scratch the surface of what Google Docs can actually do.
Whether you're writing blog posts, whitepapers, or project briefs, there are tons of hidden features that'll save you serious time. Let's fix that.
Plus, every change is auto-saved in real time, so you'll never lose your work. Google Docs also lets you write, edit, translate, and share all in one place.
Below, you'll find hacks organized into a few key categories:
- Writing & creation: Shortcuts and tools for getting words on the page faster.
- Formatting & design: Tricks to make your documents look polished and professional.
- Collaboration & sharing: Features that make working with your team seamless.
(Be sure to catch the bonus hacks for Google Workspace users at the bottom of this post.)"
Key Takeaways
- Google Docs enables distraction-free writing, voice typing, offline access, and keyboard shortcuts that allow users to complete entire documents without leaving the application.
- Built-in tools like Explore for web research, automatic translation, version history, and find-and-replace make editing and collaboration faster without switching between apps.
- Sharing permissions let collaborators view, comment, or edit documents, with the ability to assign specific comments as tasks and track changes through version history.
- Google Workspace users gain additional features including custom organizational templates and an Activity Dashboard to monitor document engagement.

Google Docs hacks for Gmail
If you've got a Gmail account, you already have access to most of these features. Google Workspace teams get a couple of extras like templating and user tracking, but there's plenty here for everyone. Let's dive in.
1. Use Chrome to find or create Docs
In our previous post about Google Drive hacks, you saw how easy it is to create, save, and manage Google Docs (and other file types) from your main drive.
But did you know you can do the same thing right from your Chrome address bar?
Type “docs…” along with a descriptive keyword, and Google will auto-populate matching results from your drive.
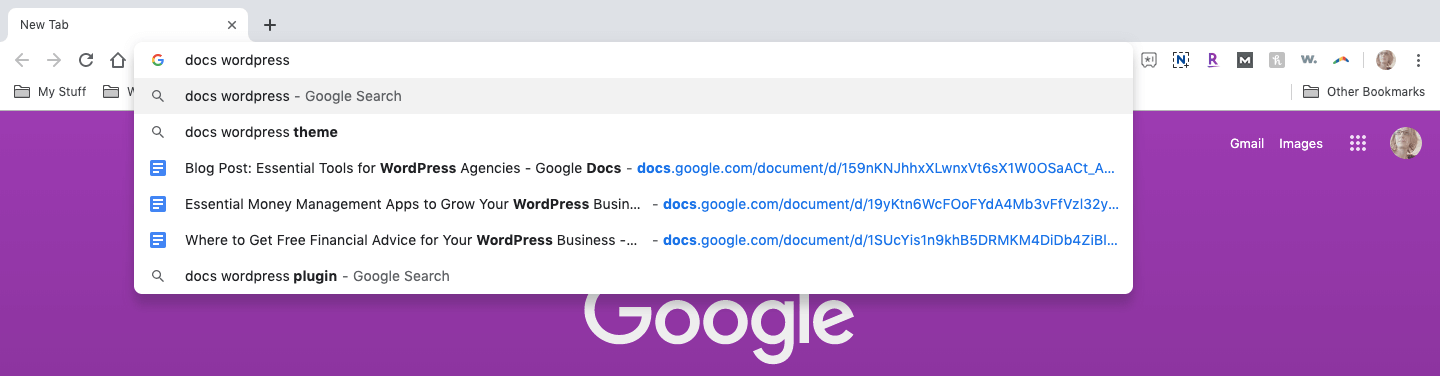
Or, if you want to create a new Google Doc altogether, just type “docs.new” in the address bar:

Chrome will immediately direct you to a brand new document:
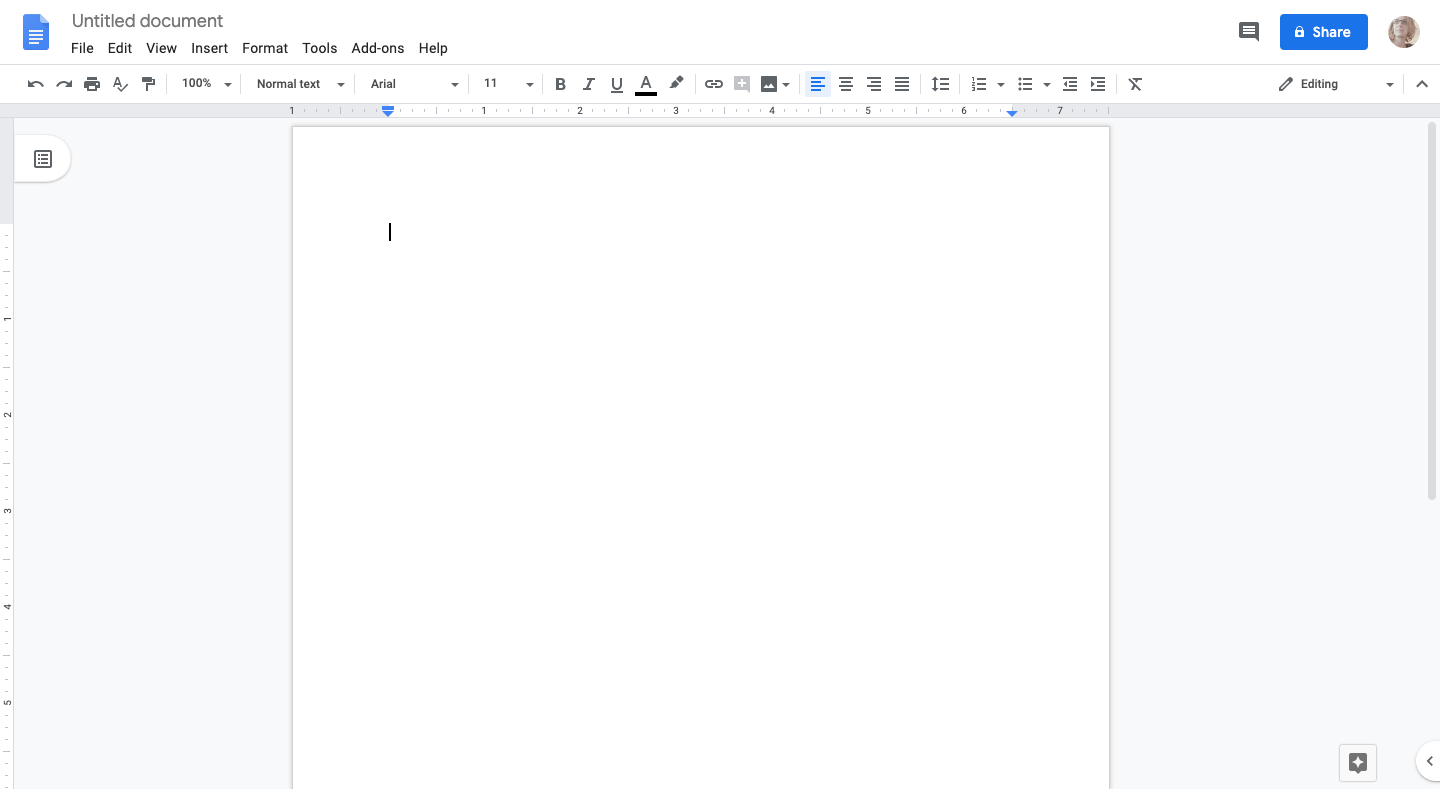
The only thing it won’t do is place it in the folder structure of your choosing. However, you can easily do that from File > Move to….
2. Work in distraction-free mode
As you can see above, Google Docs comes with a standard menu bar and toolbar. But if you feel like all that extra stuff at the top of the document is getting in your way, get rid of it.
To set up distraction-free mode, go to View > Full screen. The top bars will disappear and all you’ll be left with is your document:
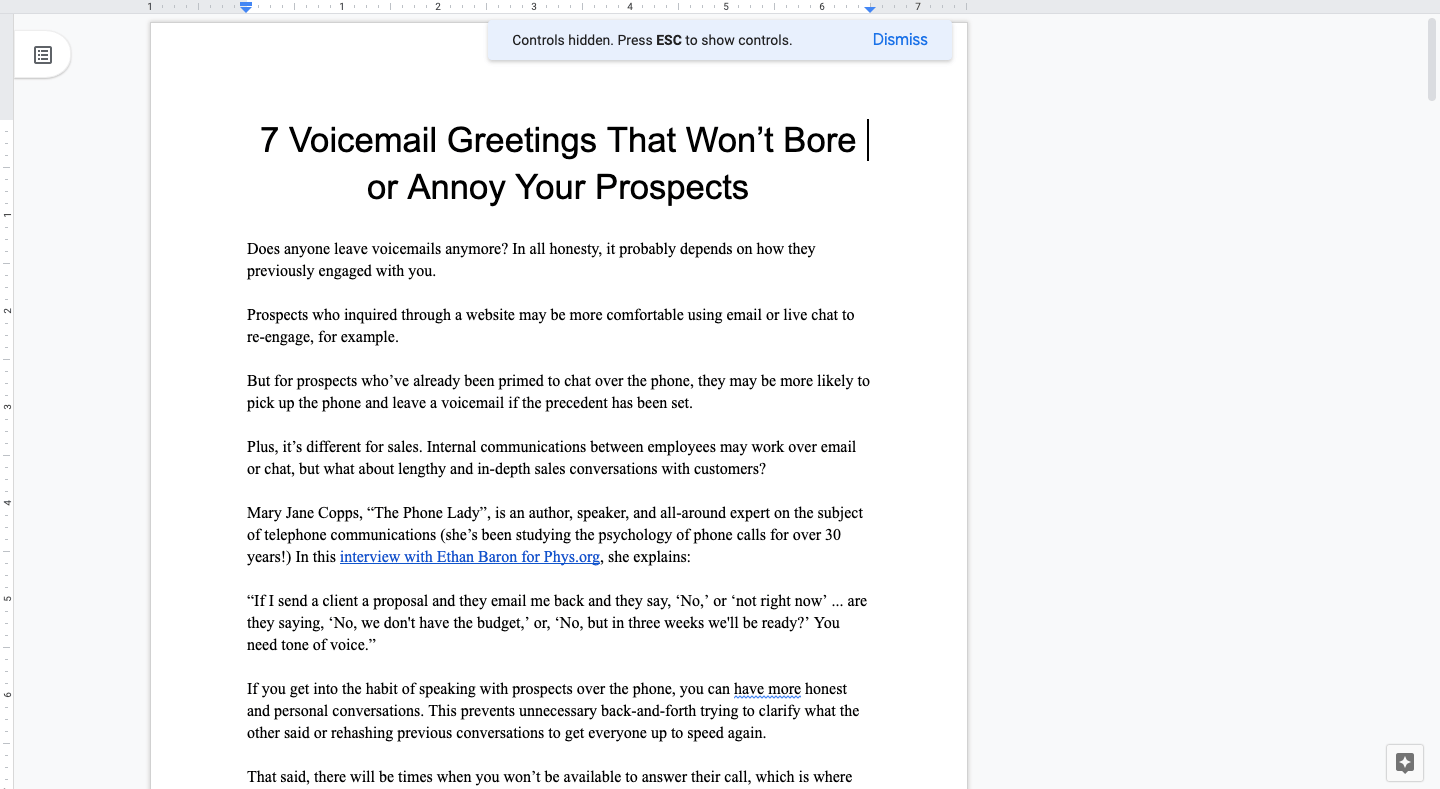
To return to the standard view, click your “ESC” key.
3. Learn keyboard shortcuts to have full control over your doc
Be careful with distraction-free mode. While it’s easy to bring the top bars back into view, the whole point of removing them is so you can work without distractions or breaks.
In order to keep yourself 100% in distraction-free mode, you’ll want to master Google Docs’ shortcuts:
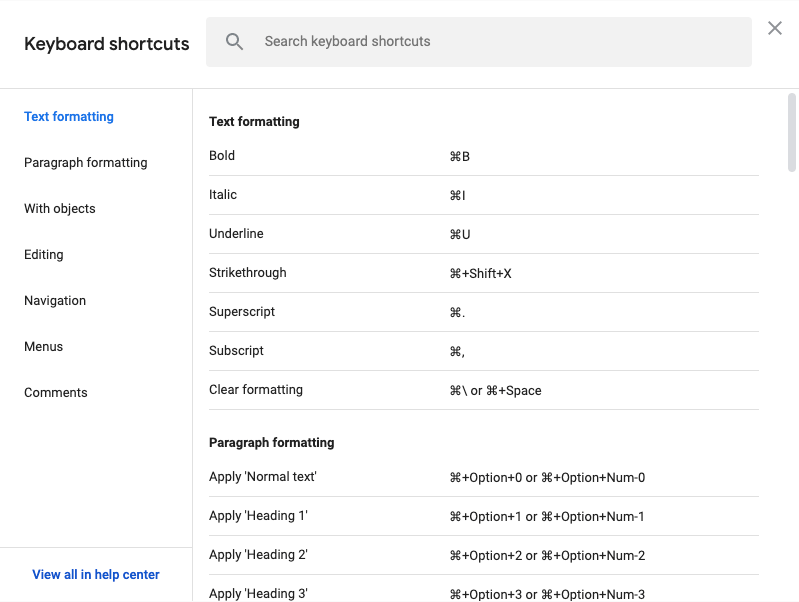
This way, if you decide to copy and paste a paragraph to a new spot, you won’t need the Edit menu to do it. Just Command + C and V—your fingers won’t even have to leave the keyboard. With a couple of keyboard clicks, you can get almost anything done in seconds.
Shortcuts are helpful for more than just editing content too. You can use them to format and style your page, open Google Docs features, and even insert comments into the doc.
4. Use talk-to-type for hands-free writing
Let’s say you have a bulky bandage covering your finger. No matter how much you try to watch what your typing, your oversized middle finger keeps typing “u” or “8” when what you really want to type is the letter “i.”
You could try to power through it, but it’s going to drive you nuts. Especially if you have a lot of writing to do.
Or you know, maybe your hands are just occupied.
Thankfully, Google Docs has a talk-to-type option available under Tools > Voice typing…. Click the microphone icon when you’re ready to start speaking and Google Docs will start typing your words on the page:
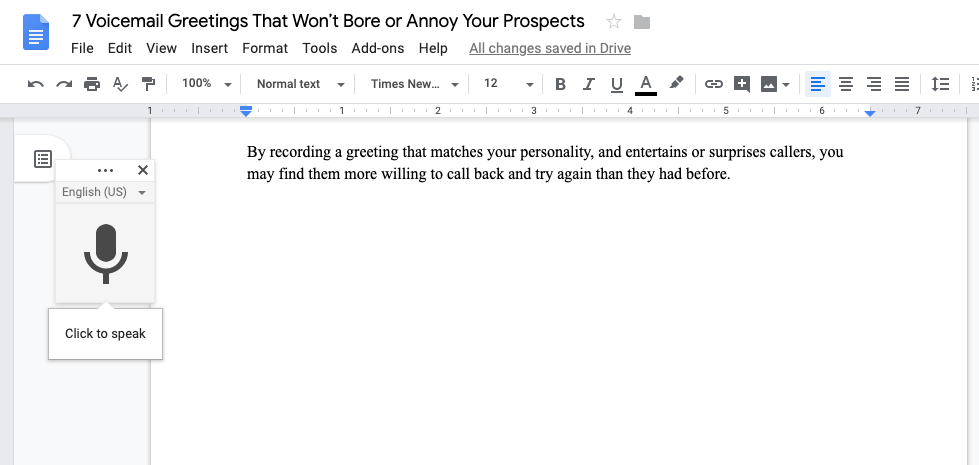
Keep in mind that you’ll need to dictate punctuation as well. It’ll take some getting used to, but it’s a good option if your hands are otherwise busy—and it beats the frustration of typing with a busted finger.
5. Make your Doc available offline
The offline feature is really handy for when you need to keep working, but wifi access isn’t available.
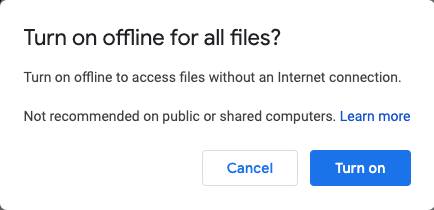
And if you didn’t remember to turn on offline access from Google Drive, you can do so from any of your open Google Docs. You’ll find this under File > Make available offline:
6. Use the outline to plan and optimize your content
For single-page and other short documents, you probably won’t need an outline. However, when you use Google Docs to create things like documentation, ebooks, or articles, you could end up with a couple dozen pages in the end.
If you want to keep things organized while you’re working, open the outline sidebar on the left:
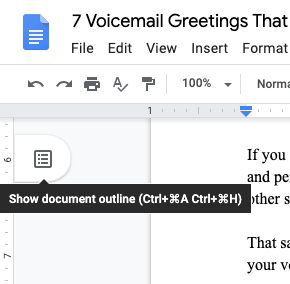
Pro-tip: Your outline will only populate once you’ve used the Title and Heading styles on the page.
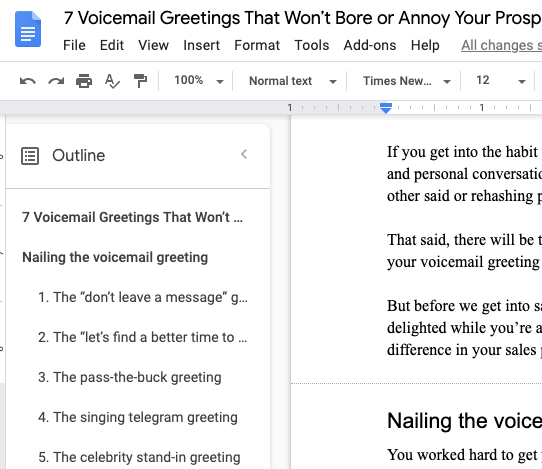
If you look at the snippet above, you can see that the title is the first item in the outline. The first heading, “Nailing the voicemail greeting,” is the next one.
The other points in this outline are indented to demonstrate hierarchy. For instance, if you used a Heading 2 for the overarching topic and then Heading 3 for sub-topics, you’d have a really nice outline to work with — as well as a post that’s easy to scan and read.
You can also click on chapter headings in your outline to quickly move to different sections of your post, rather than scroll and scroll until you find it.
7. Embed and edit photos in your docs
Google Docs don’t just accommodate text. You can embed images into them as well.
To do this, go to Insert > Image. You then have the option of embedding images from:
- Your computer
- The web
- Google Drive
- Google Photos
- A URL
- Your camera
Be careful with images from the web or a URL though. If your document is only for internal company purposes, you’re free to use whatever you like.
However, if your document is for commercial purposes (like in a company flyer or on your website), there are limits to what you can use. To be safe, get your images from stock photo websites like Unsplash where you’re allowed to use any image for free on the web.
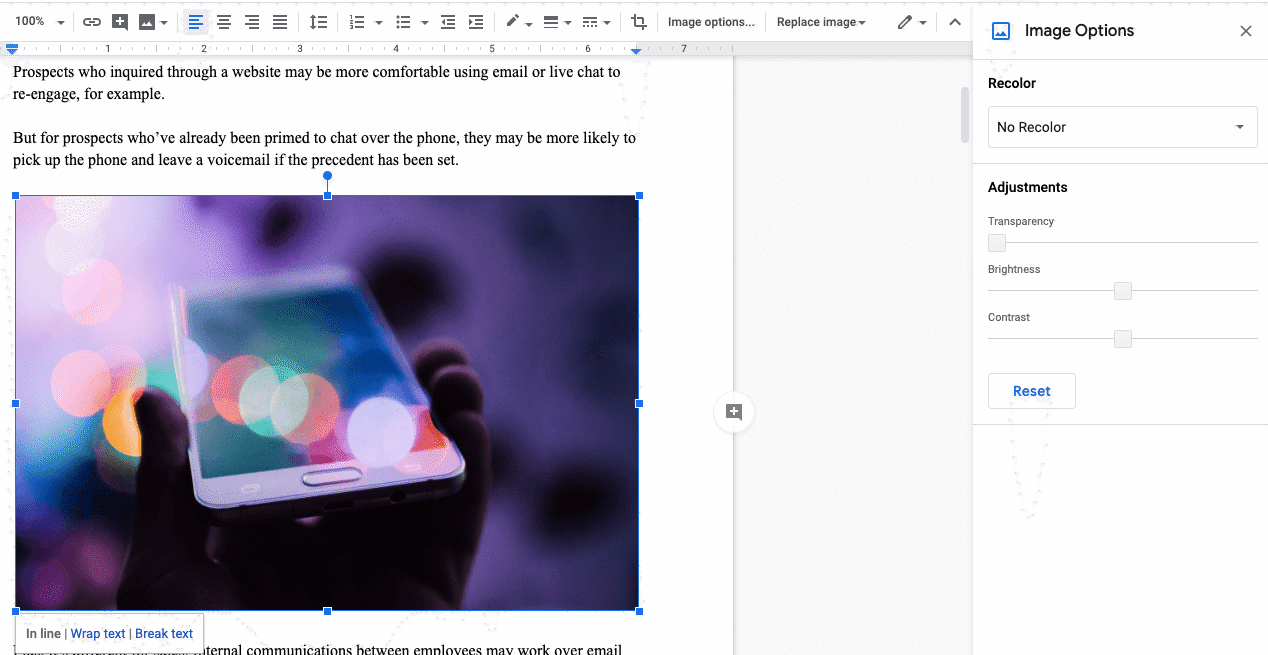
Once you’ve found images that work, go ahead and make edits inside Google Docs.
For example, you can drag-and-drop the image’s borders to resize it.
Also, when you click “Image options…” in the toolbar, you can even apply shading to your image:
Another useful image editing feature is the crop.
When an image is selected, a crop icon will appear to the left of “Image options…” When selected, your image will look similar to this:
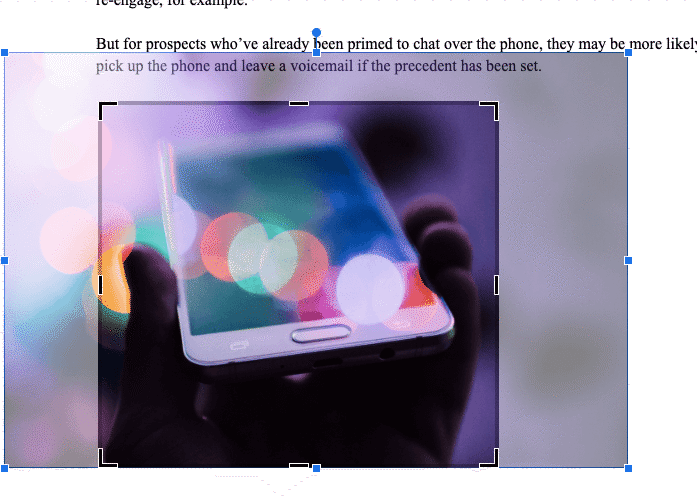
The lighter shaded area is where the boundaries of the image originally stretched to. However, by dragging the black border lines inward, you can cut the image to where it needs to be.
If you’re unhappy with it, you can click on the crop icon again and restore or fix the image (since you never lose the original edges entirely). Or you can use the keyboard shortcut Command + Z to undo it.
8. Insert custom visuals
You can embed other kinds of visuals into your documents, too. For example, you can insert a table like this from Insert > Table:

All you have to do is pick the dimensions of the table from the menu and Google Docs creates it for you. If you want to edit how many rows or columns there are, right-click on the table and use the options to adjust accordingly.
Another kind of visual element you can create is a drawing or shape. You can add this under Insert > Drawing:
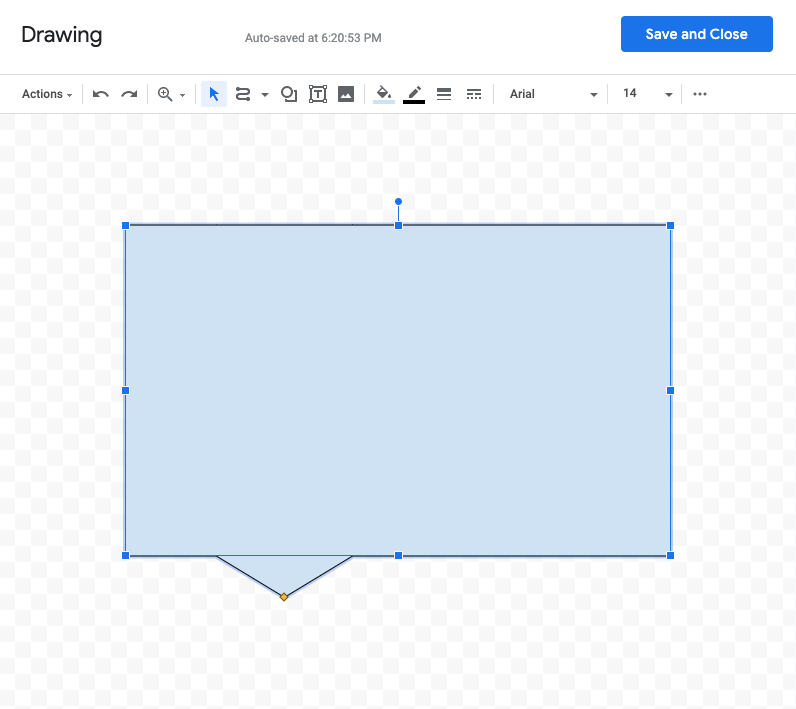
To add a new drawing, simply create it in the newly opened Draw application. Then, Save and Close it. Your new image will now be embedded on the page.
What’s more, if you keep it connected to the original that lives in Draw, you can make edits there and sync them to your doc so you don’t have to recreate the drawing if changes are needed.
The same goes for any charts or graphs you create through Insert > Chart:
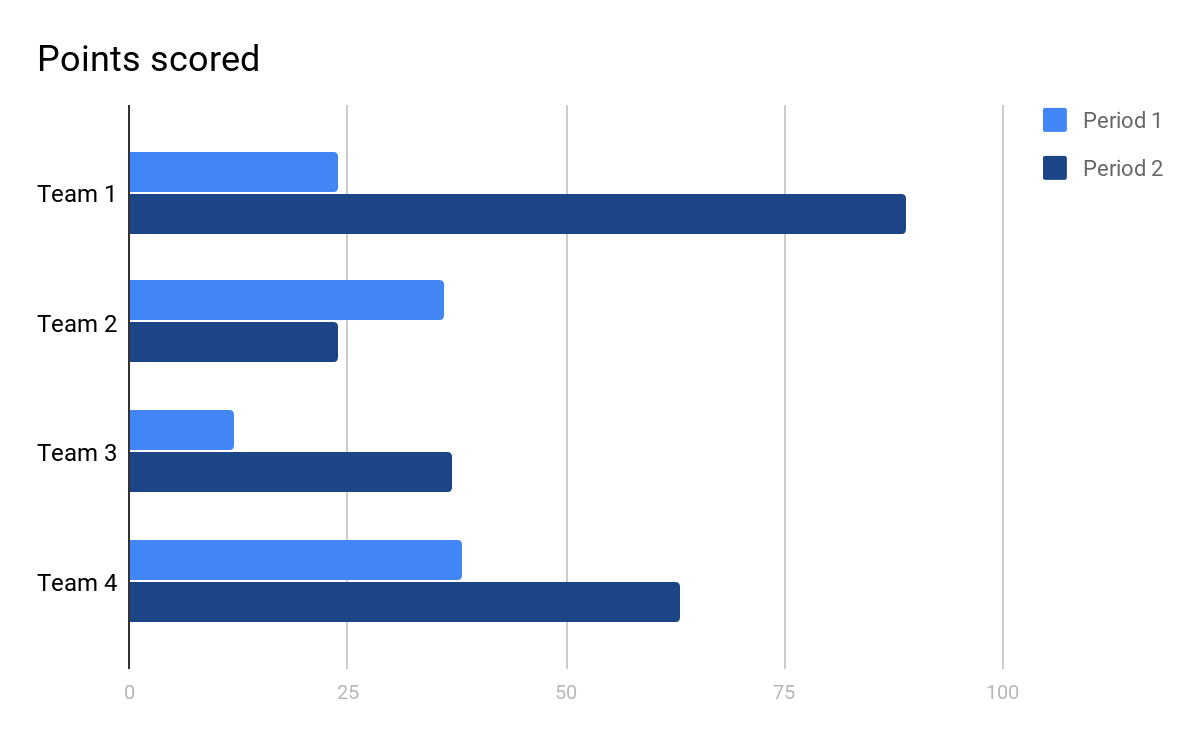
Your data may change or someone may provide feedback that forces you to remove or edit an item. By creating that connection between Google Docs and the custom visual element in another Google app, you only have to make edits to one copy of it.
9. Add a table of contents, footnotes, and page numbers to longer documents
For longer, more formal documents, you may want to use elements like:
- A table of contents to organize chapters
- Footnotes to provide additional information and links
- Page numbers for easier reference points
Rather than add each of these into your doc manually, let Google Docs to do the work for you:
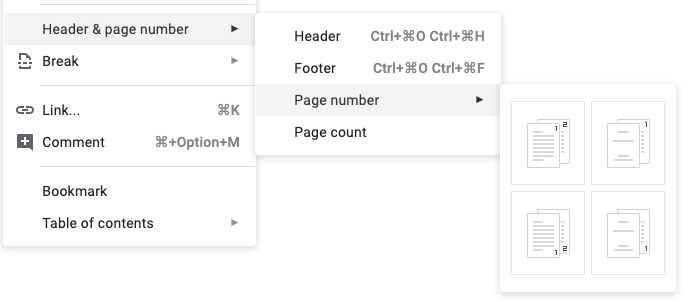
You’ll be able to find all three of these report- and book-friendly elements (and more) under the Insert menu. Choose the format you prefer and Google will auto-populate the doc with what you need.
10. Use smart chips to organize projects faster
Google Docs has quietly become way more than a word processor. One of the biggest upgrades? Smart chips.
Instead of pasting long links or typing out people’s names manually, you can type “@” anywhere in a document to quickly insert:
For example, let’s say you’re writing a project brief. You can instantly tag the project owner, attach the related Google Sheet, and insert the launch meeting... and all without leaving your doc.
It makes documents feel less like static pages and more like collaborative workspaces.
If your team spends a lot of time hunting for links or context, smart chips cut down on the back-and-forth fast.
11. Use building blocks to create polished docs in minutes
If you’re still creating meeting notes or project trackers from scratch every time, Google Docs has a faster way.
Google Workspace includes pre-built “building blocks” that let you drop structured layouts directly into your document.
You can insert templates for things like:
google docs building blocks
To access them, type “@” in a document or go to Insert > Building blocks.
These layouts automatically pull in useful details like meeting attendees, checklist formatting, and status fields so your documents are organized from the start.
It’s one of the easiest ways to make internal docs look cleaner and more professional without spending extra time formatting.
12. Switch to pageless mode for easier collaboration
Traditional page breaks make sense for printing. But for collaborative work? They can get annoying fast.
That’s why Google Docs introduced pageless mode.
Instead of working inside fixed pages, pageless view creates one continuous workspace that’s easier to read on laptops, ultrawide monitors, and mobile devices.
google docs pageless mode
Pageless mode is especially helpful for:
To turn it on, go to File > Page setup > Pageless.
Once you try it, going back to traditional pages can feel surprisingly cramped.
13. Organize long documents with tabs
If your docs are getting longer and harder to navigate, tabs can help keep everything organized.
Google Docs now lets you create tabs inside a single document, similar to how spreadsheets organize information across multiple sheets.
google docs tabs
Instead of scrolling endlessly through one massive document, you can separate content into sections like:
This is especially useful for teams managing large projects or shared documentation.
Combined with the document outline feature, tabs make navigating long Docs much faster for everyone involved.
14. Use Gemini in Google Docs to brainstorm and summarize faster
Sometimes the hardest part of writing is getting started.
Gemini for Google Workspace can help speed things up by assisting with:
gemini in google docs
For example, if you have a messy page of meeting notes, Gemini can help turn them into a cleaner summary or action plan.
It’s also useful for polishing rough drafts when you need a second pass on clarity or tone.
AI tools won’t replace good writing, but they can definitely help you move faster when you’re staring at a blank page.
15. Explore the web from your Google Doc
If you like the idea of staying in your Google Doc to do all your research, Google has made this easy with its Explore feature (which is basically Google search from your doc).
Go to Tools > Explore and Google will open a search explorer on the right side of your page.
You can search for articles on the web if you want to verify a point, find a useful statistic or quote to cite, or do other research:
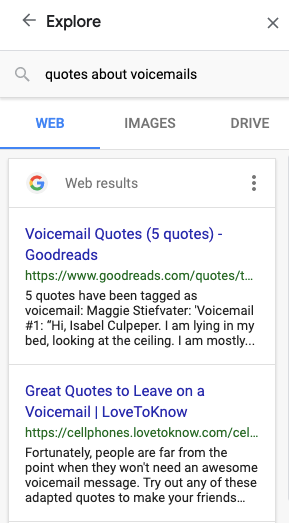
You might also want to use Explore to reference things you’ve written and saved in your drive.
You can search through images on Google, too:

16. Share your doc with others
Once you’ve written what you need to, it’s time to open it up for review, feedback, and/or editing.
The blue “Share” button in the top-right corner of the page allows you to share your document with others:
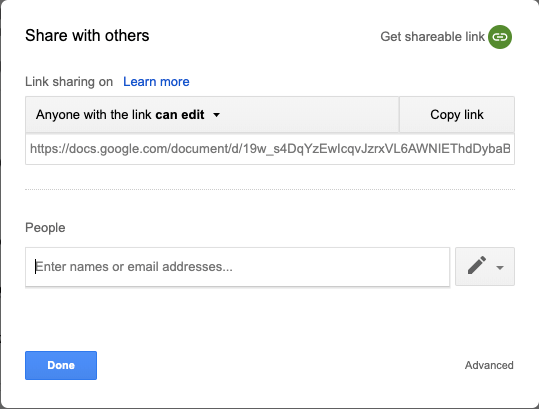
The first thing you have to decide is what you want others to be able to do:
- View means they can read what’s on the page.
- Comment means they can leave notes on parts of the page where they have questions or feedback.
- Edit means they can actually change the content on the page.
If you want to send the document to a large group of people, change the setting by clicking “Anyone with the link…”
If you want Google to send a link to the document to your users instead, enter their email addresses under the “People” field. Then, click the pencil icon to switch their access rights.
17. Send emails directly from your doc
The “Share” option is best for the first time you send a document to someone. Once they’re attached, though, you’ll have to email them to let them know when their attention and feedback is needed.
There’s no need to move to your Gmail tab to do that.
When you want to message someone about a page they already have access to, use File > Email as attachment… instead:
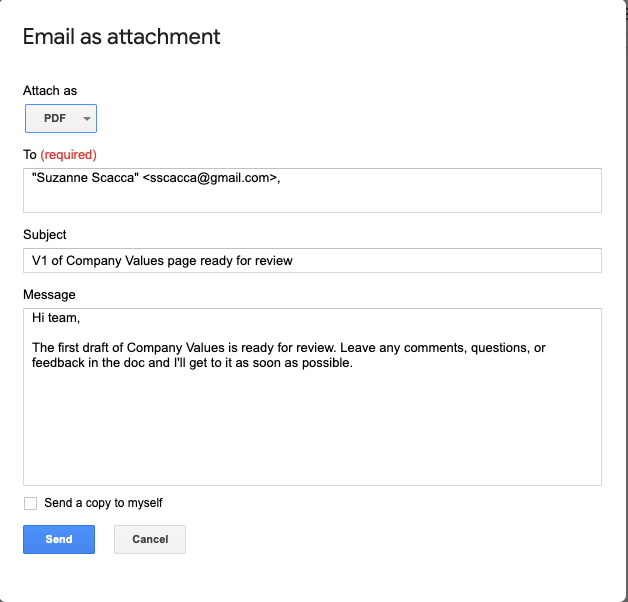
What’s nice about this option is that you can automatically convert your Google Doc into another file format and have Google attach it to the message for you.
If you’d rather keep it as a Google Doc, that’s fine, too. Just change the “Attach as” option to what you need.
18. Add comments or suggestions to your doc
Let’s look at what happens after you share a document with someone else or they share a document with you:
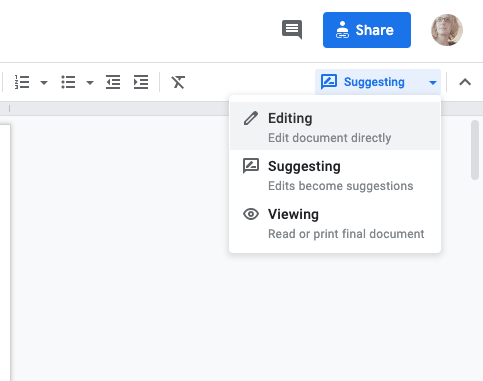
Just as there are three options under “Share,” there are three options under the access dropdown in the top-right. That is, the creator of the page (you) will see these options. Everyone else will only see what they’re allowed to do.
Viewing is straightforward. They’re allowed to read what’s on the page, but can’t make any changes to it. They won't be able to “Comment” or “Suggest edits” like this:
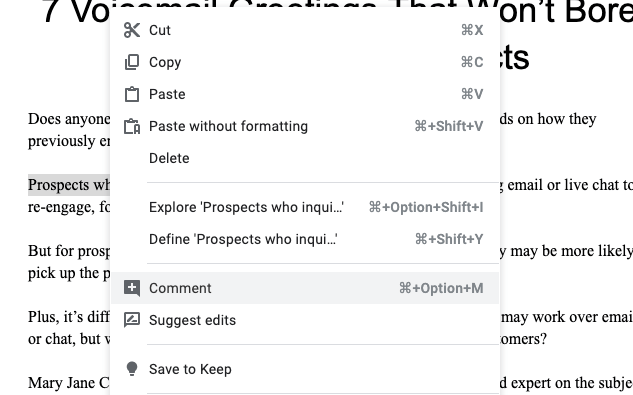
When Suggest mode is turned on, people can highlight a bit of text or an image and leave a note for the author or admin of the page.
They can also suggest edits which will show up on the page as markups, along with a corresponding comment on the sidebar:

It’s then up to the author to accept, reject, or resolve the comments using the buttons in the comment boxes.
Anyone with Editing access won’t need to use the suggestion or commenting tools as they’ll have full access to the page—unless you’re working collaboratively on a doc and want everyone’s suggestions, including your own, to be tracked.
That said, if you want to review what others do before including the changes in your document, it would be best to assign them specific privileges.
19. Assign comments directly to team members
Within the comments themselves, you can do a number of things besides resolve them.
You can edit or delete the comment you just wrote, and even copy a link to the comment in case you want to bring someone’s attention to a specific question or comment.
Or, even better, you can tag them in the comment or reply field like this:
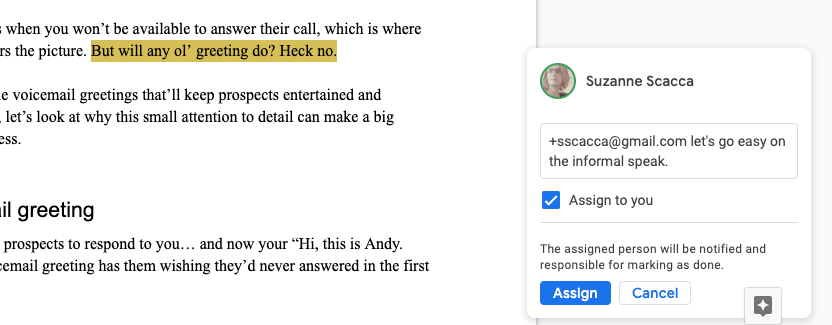
It’s the same as how you’d tag someone on social media. Either type “@” or “+” and then enter their name or email address. If they’re in your contacts list, Google will fill the rest in for you.
If you want to assign the comment as a task, click the “Assign to” option and they’ll receive an email about the comment and to-do:
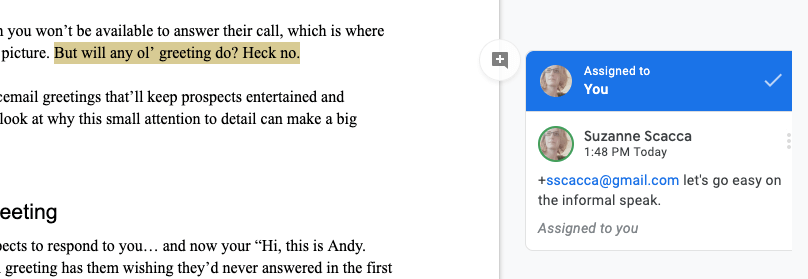
This is how the new comment/task will show up on your page. This is now assigned to a specific person to handle, which can come in handy if you have different subject matter experts who can deal with certain questions better than others.
20. Make text edits in bulk
In general, it’s very easy to edit in Google Docs. Just place your cursor where it needs to be, or highlight a string of words, and make your changes.
But when you need to make the same change throughout the page, it can quickly become a tedious process.
To make the same change and just do it once, go to Edit > Find and replace…. It will open a text box like this:
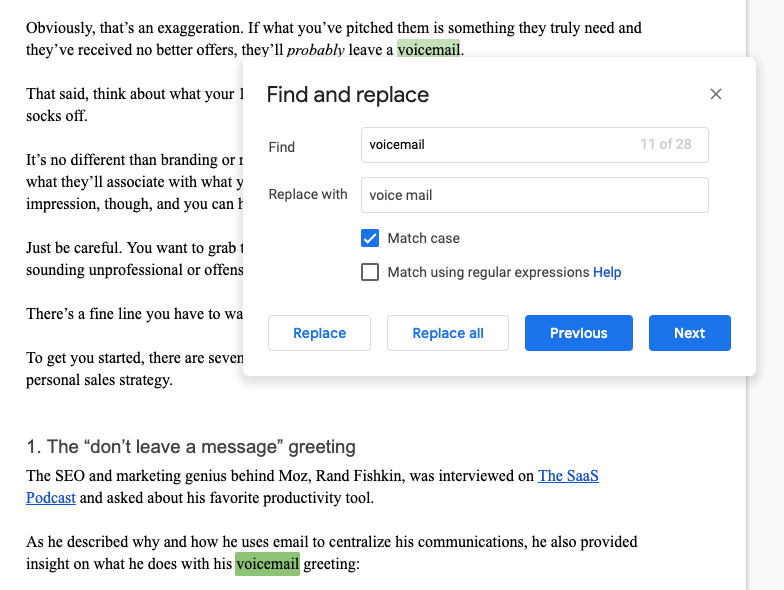
Type whatever it is you want to find, enter the replacement text, and then click “Replace all”.
This isn’t just useful for spelling issues either.
For instance, you might have someone who’s written something with extra spaces placed after periods. You could ask them to clean it up—or you can just use find-and-replace to clean out double or triple spaces hanging around in a matter of seconds.
21. Revert to a previous version
Sometimes, the new-and-improved version of a page doesn’t work. Or you’re just curious about what kinds of changes other people have made to your document.
Thankfully, you don’t have to dig through emails or your hard drive to try to find previous versions.
With Google Docs, go to File > Version History:
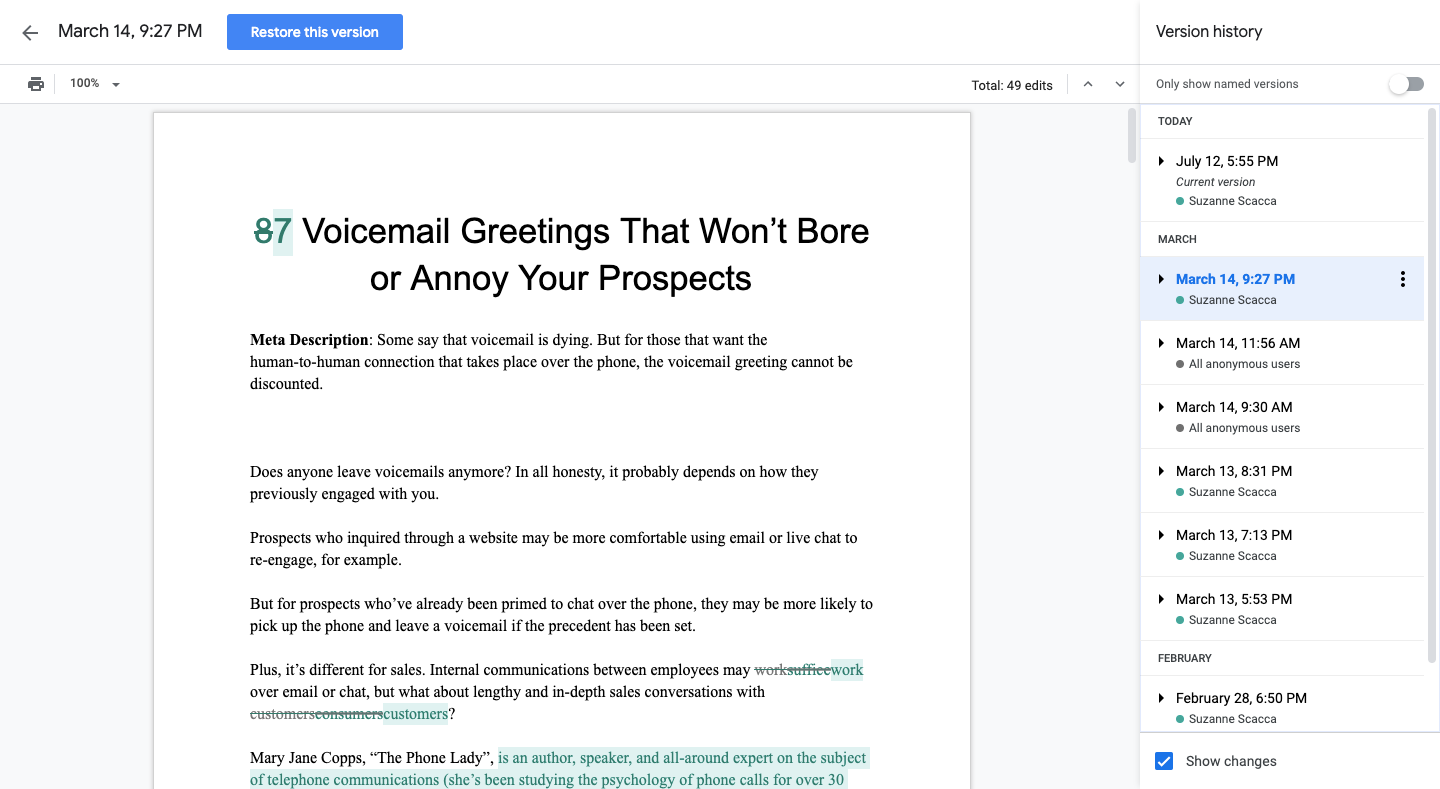
Since Google autosaves whatever you write, it usually has a bunch of versions you can look back through. It will show you:
- The date and time it was saved.
- The last person who edited it.
- What the exact changes were on the page.
You can use your version history to check on edits to the page, and also restore a previous version. Choose the one you want and click the blue “Restore this version” button.
Version history is also useful if you want to better organize your drafts.
When a version is highlighted, a button appears in the right corner of the block:
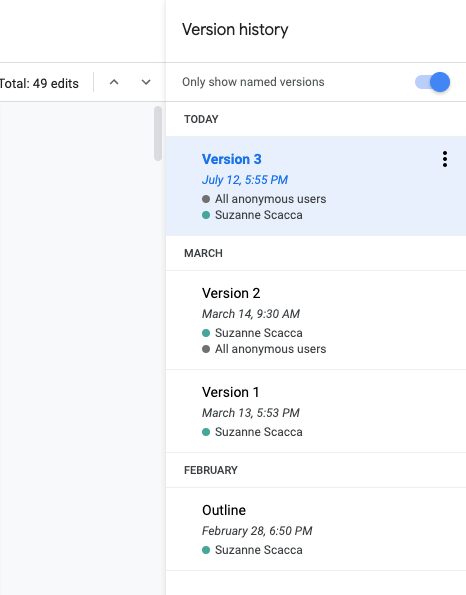
Click on it and give the version a name. Then, if you want to remove all the excess “noise” of the unnamed versions, click the “Only show named versions” toggle up top.
This allows you to keep better track of what each of your deliverables looked like and how the page has progressed from start-to-finish.
22. Export your doc to different file formats
Unless you’re using Google Docs to create internal company documentation, you’ll probably need to export them into other formats. Like PDFs for company flyers. Or web pages for your developers to use on the website.
Unlike some word processing tools that make it difficult to change from one format to another, Google Docs makes it easy to convert your documents.
Go to File > Download as and you’ll find other file formats available:
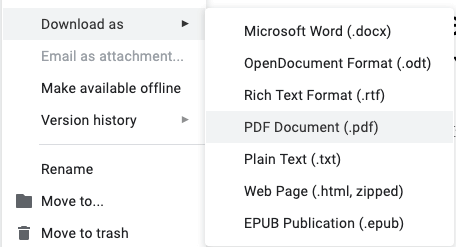
Your document will instantly download to your hard drive in the chosen format.
23. Improve your content with add-ons
If you’re using Google Docs to create content for your business (like blog posts, ebooks, or reports), you should use more than just the hacks above.
Under Add-ons > Get add-ons, you’ll find a lot of different tools to help you create better content:
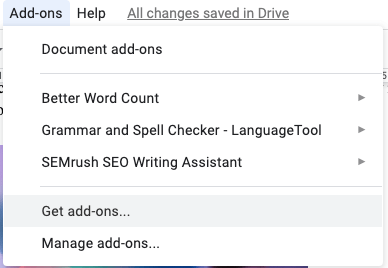
In the example above, you can see that there are three already installed:
- Better Word Count, which shows exactly how many words and characters are on the page or in a highlighted selection of the page.
- Grammar and Spell Checker, which provides advanced spelling and grammatical checks for other languages and dialects.
- SEMrush SEO Writing Assistant, which assesses the quality of content for the web.
There are many more too, including add-ons for voice-to-type, thesaurus, diagram creation, SEO, templates, GIFs, signatures, and more.
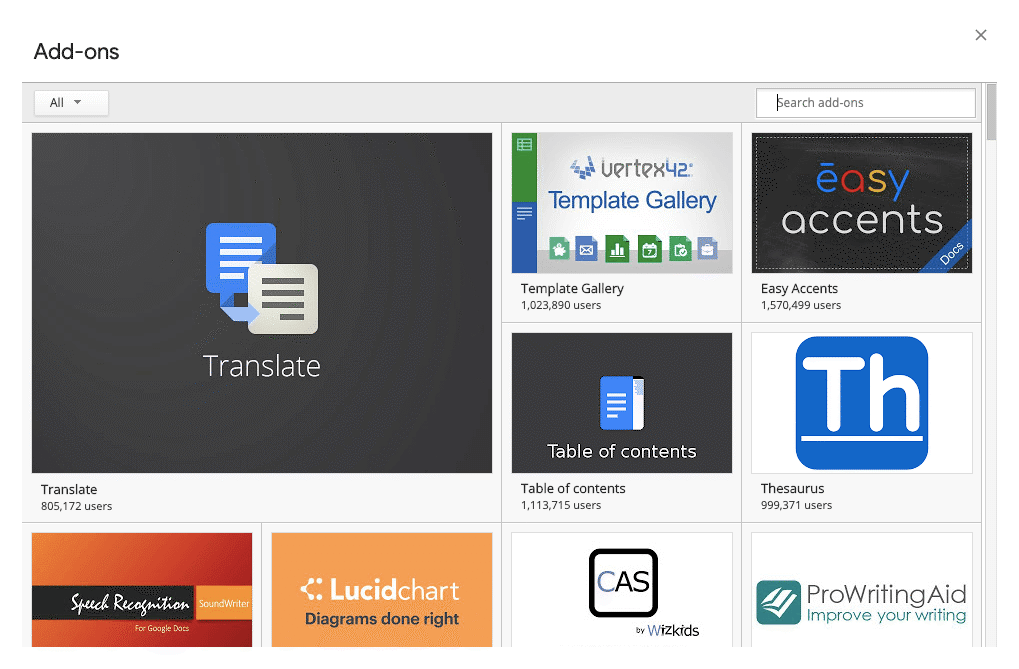
To use any of these extensions, install them from the list of add-ons. Then, choose the one you want from the Add-ons menu.
One thing to note about these add-ons is that you can only use one at a time as it fills the same sidebar space.:
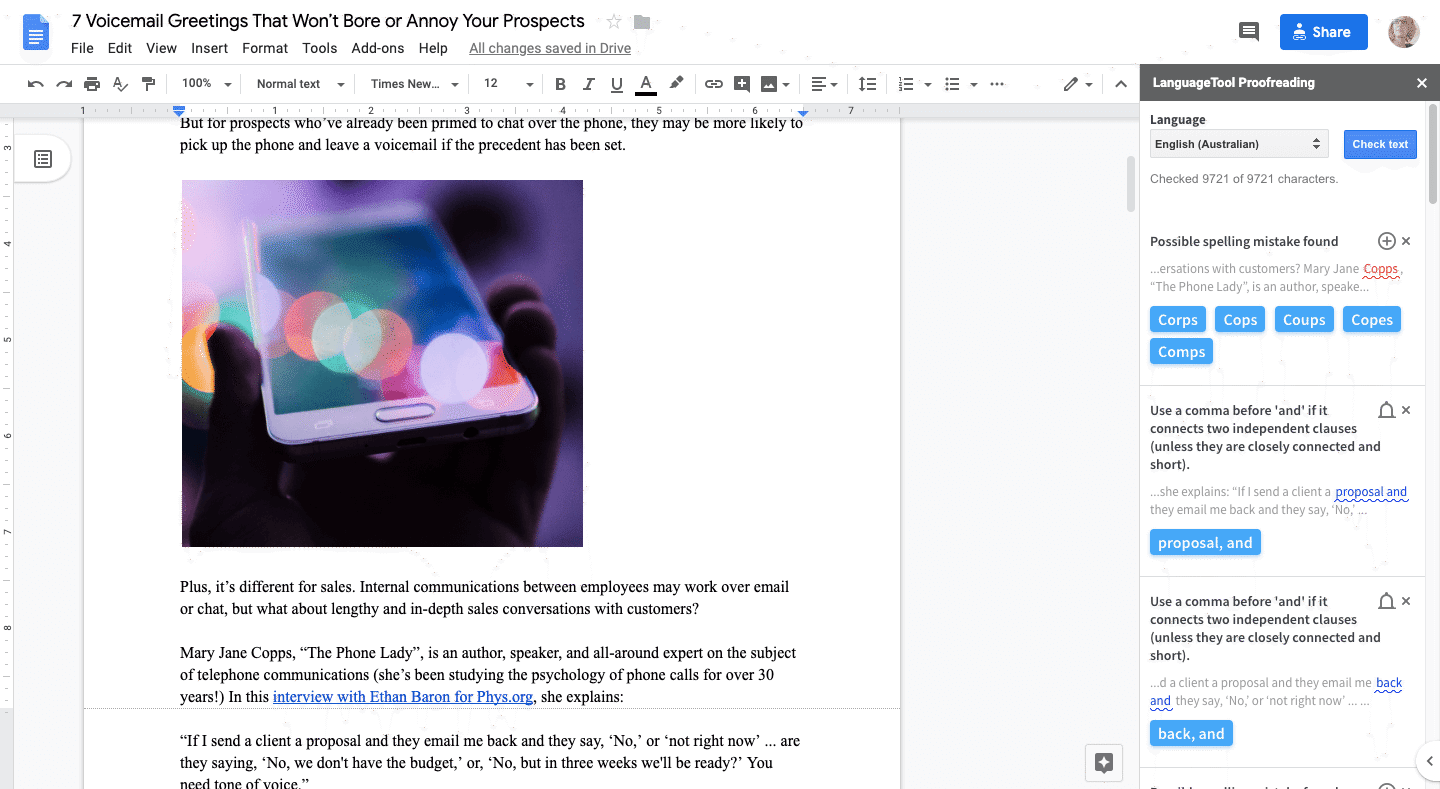
When you’re ready to take your content to the next level, these add-ons are waiting for you.
Google Docs hacks for Google Workspace
Now, here are a few Google Docs hacks for those of you who have access to Google Workspace.
24. Create a template for your organization
When creating a new Google Doc from your team drive, you can start with a business template as your base:
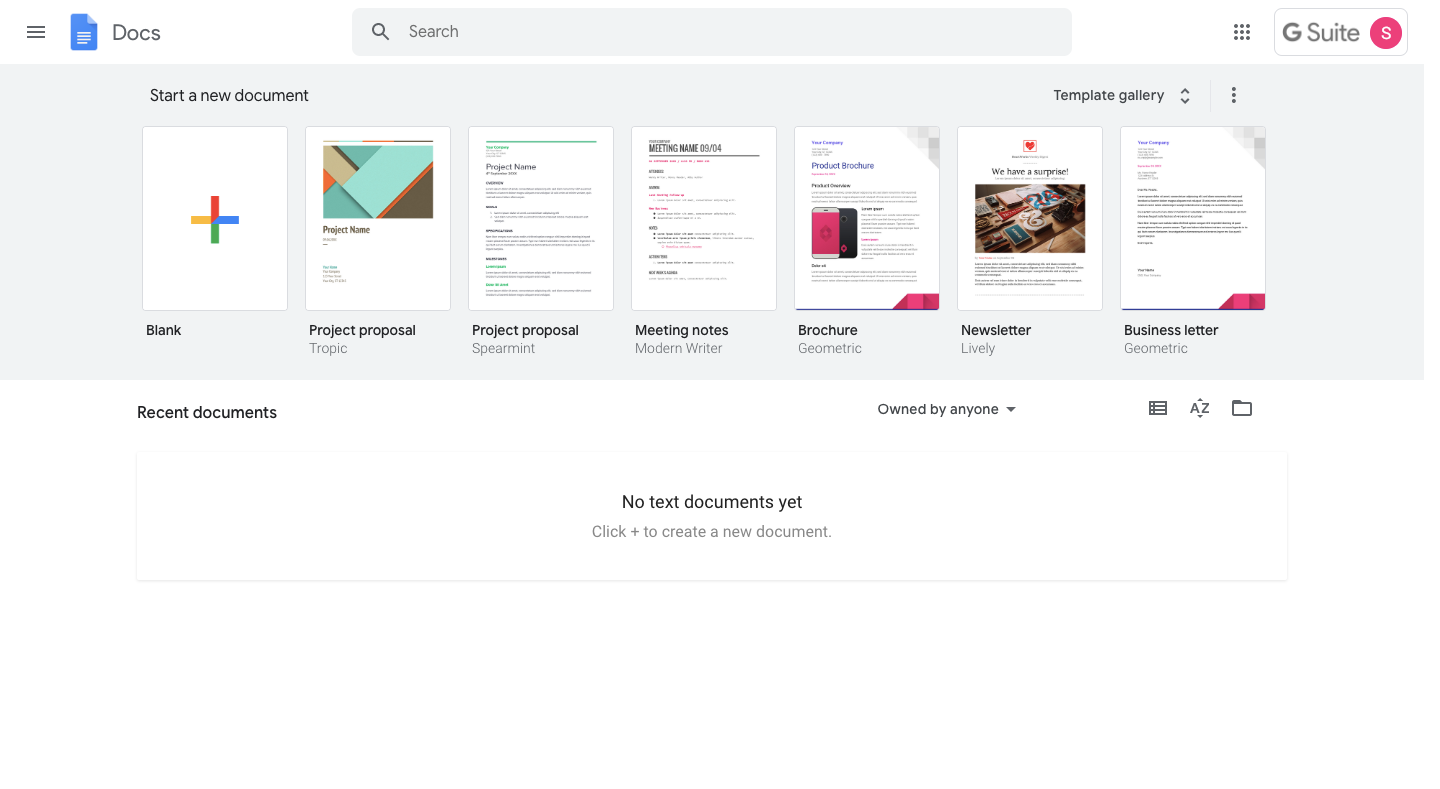
You might want to tweak the template or create your own in order to give your business collateral a look that’s unique to your brand.
You can do that with Google Docs. However, in order to ensure your team uses the same templates for their own documents, you’ll need to save it somewhere.
Gmail users don’t have the ability to save templates, but Google Workspace users do.
From your Template gallery, select the option to submit your own template:
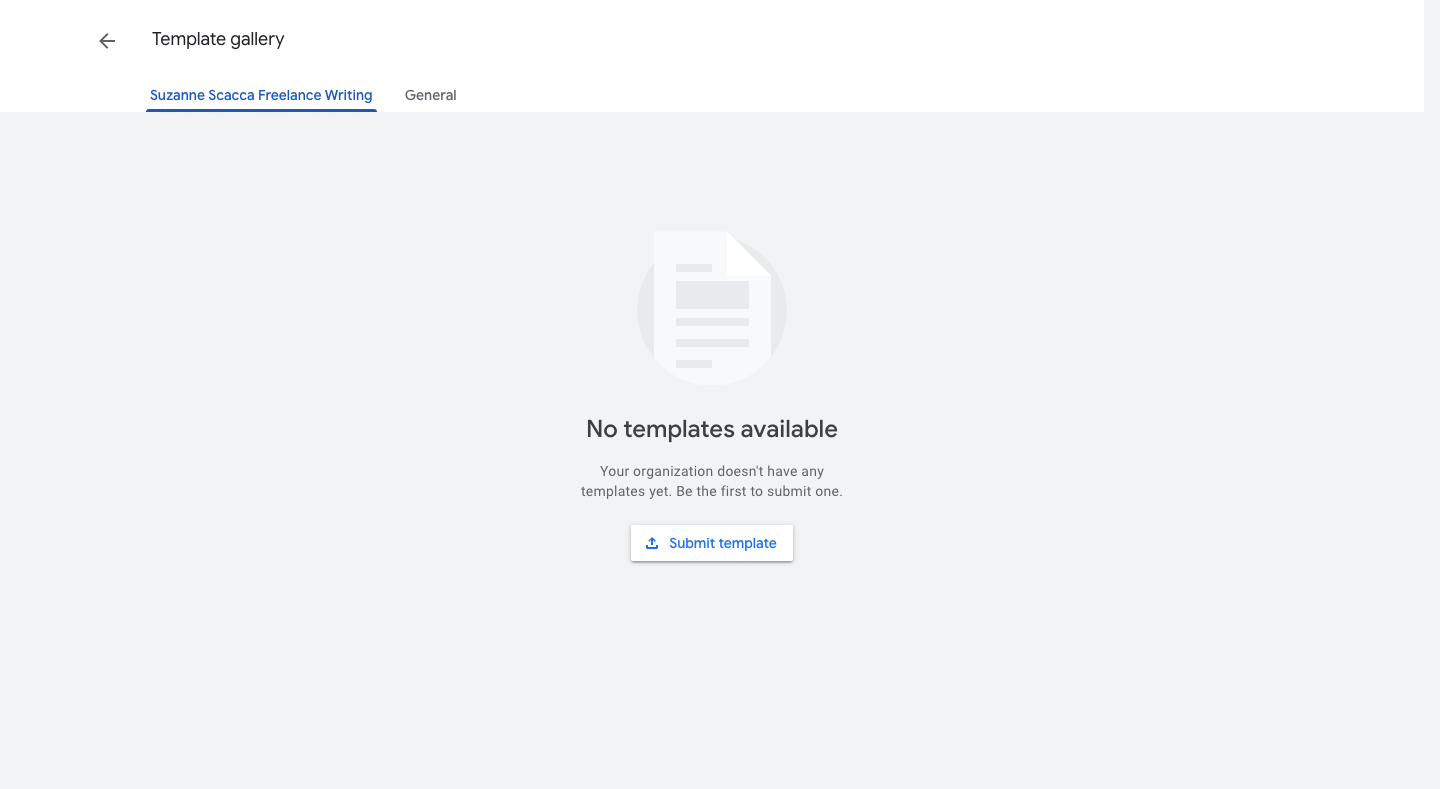
Then, save it in your team drive and let everyone know it’s available to use.
25. Improve your writing with Google Docs
Wouldn’t it nice to be able to do more than just type words onto a page?
With Google Docs, you gain the ability to complete the entire lifecycle of writing, from research to writing to sharing and editing. And you can do it all from the same page.
If your team is spending more time than it needs to on working across different apps and delivering documents in various formats, Google Docs will get everyone on the same page — literally.